Upgrading firmware is a common and very important content in the daily maintenance of servers. If the number of servers is large, the workload of manual upgrade is huge, and it is impossible to meet the maintenance requirements. The ThinkSystem server supports the operation of upgrading firmware through Lenovo’s proprietary OneCli tool for server operations, which greatly alleviates the difficulty of server maintenance. Here we take batch upgrade XCC firmware as an example to briefly introduce how to batch update server firmware through OneCli Tool.
一、 Purpose
This document provides information about how to remotely (OOB) batch upgrade/downgrade system firmware on Lenovo ThinkSystem Server by using Lenovo XClarity Essentials OneCLI multiflash program. Detail support server models please refer to Lenovo XClarity Essentials OneCLI User Guide.
https://sysmgt.lenovofiles.com/help/topic/toolsctr_cli_lenovo/onecli_bk.pdf
二、 For Windows Platform
a) Prepare
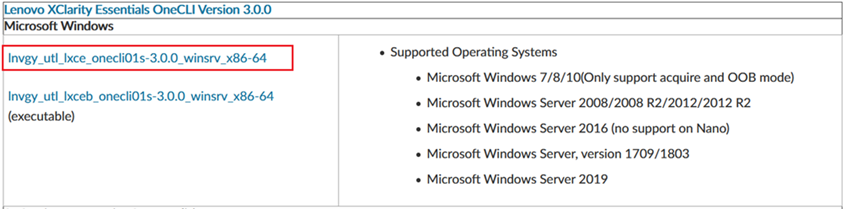
1, Download Lenovo XClarity Essentials OneCLI from Lenovo support website.
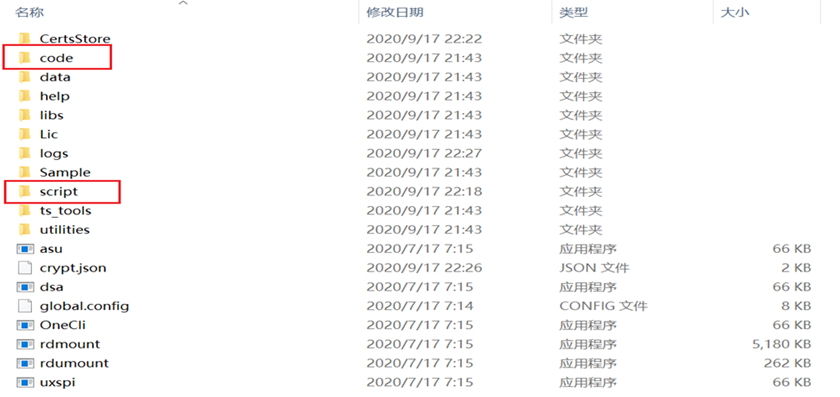
2,Unzip the tool to a location on the windows system, e.g. C:\onecli. Then create two new directories, one for firmware and one for configuration files. The directory name can be customized. Here we use “code” directory to store firmware files and “Script” directory to store configuration files.
3,The“Sample”folder contains a number of sample configuration files that OneCli needs to use. Batch firmware updates require “credentials_config.json” (plaintext password) and “multi_task_config.json”(multitask scheduling).
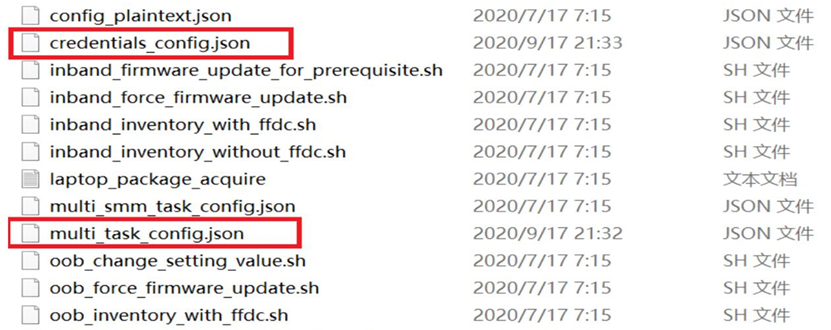
4, Copy these two files to the newly created “script” directory, it is not recommended to directly edit the JSON file in the Sample directory. After the copy is completed, you can customize the file name for easy management. Here we change the plaintext password configuration file name as pwd.json, and task.json is the multi-task scheduling configuration file.

5, Note, if all XCC use the same username and password, you do not need to configure the plaintext password file, just config the multitasking scheduler file is enough. Here we assume there are many different usernames and password for XCC(Some XCC using default USERID/PASSW0RD, some XCC using user defined account).
Attention here: Please make sure the format for the JSON file is correct. In JSON objects, key-value pairs are separated by commas, but be careful not to use a comma after the last key value. As shown in the following example, there is no "," at the end of the last key value ("key3": "value3").

{
"key1": "value1",
"key2": "value2",
"key3": "value3"
}
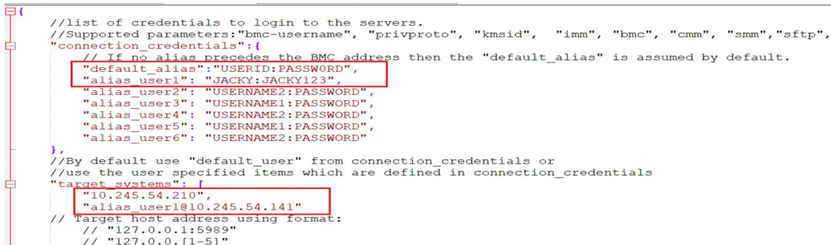
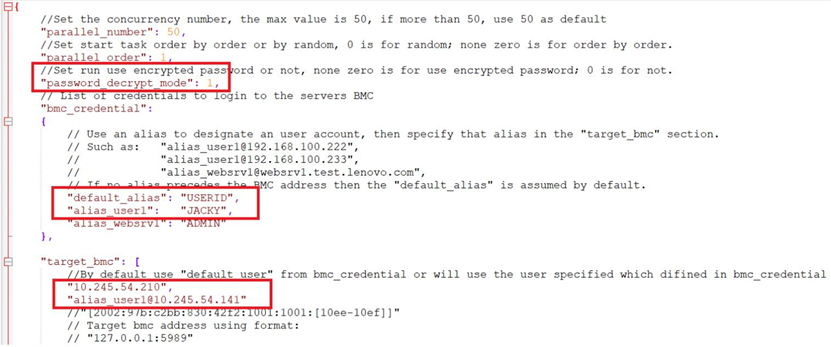
6,Edit pwd.json, as shown in below picture, from“connection_credentials”, input the default account information to“default_alias”, input user defined account information to“alias_user1”. You can config multiple“alias_user”according to actual condition, such as alias_user2 and 3. From“target_systems”, input XCC IP address, the IP address needs to match alias_user and it also support multiple formats of XCC IP Settings, for example, “127.0.[2-3].[3-253]” refers to all IP addresses within 127.0.2.3 to 127.0.3.253 address segments.
7,As shown in below picture, here we multiflash XCC firmware for two servers. The address of 10.245.54.210 using default username and password, and the address of 141 uses the username and password defined in alias_user1.
8,Edit task.json file, change the value of “password_decrypt_mode” from “0” to “1”. Note, as mentioned in step 5, if all XCC use the same username and password and you only use task.json, do not change this setting.
9,From task.json, ensure that the alias configured in “bmc_credential” and the IP address combination configured in “target_bmc” are consistent with the configuration in the plaintext password configuration file (pwd.json).
10, Use OneCli encrypt command to encrypt the plaintext password file, the “–unattended” is an optional parameter, if specified, it will not be required to enter the password. Otherwise, you need to set a password and provide it when run multiflash.
OneCli.exe encrypt [--unattended] –configfile <pwd.json>
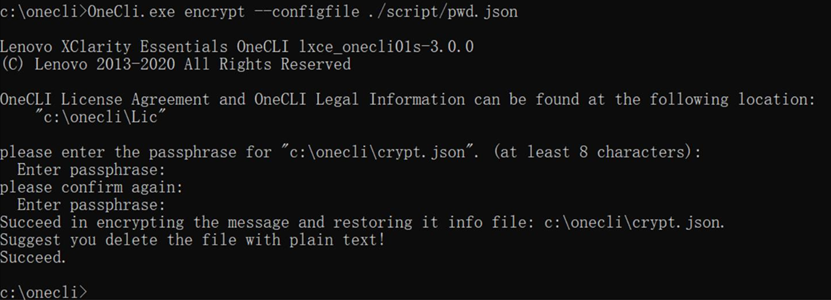
11,When the encryption is complete, a crypt. json file is generated in the onecli root directory. Note: If you moved this file to a new location, you need to edit the global.config file to specify the new path.
ENCRYPTED_CREDENTIALS_FILE_PATH

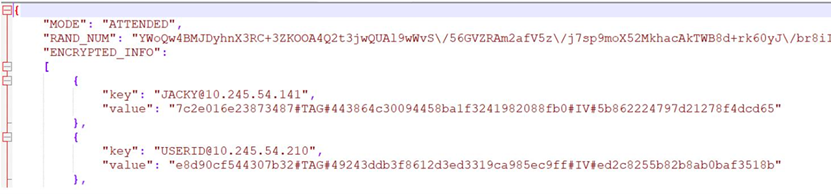
12,crypt. json encrypts the plaintext password.
b) Upgrade Firmware
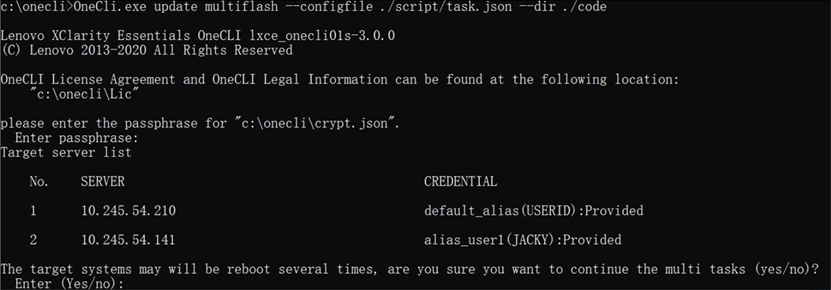
1,Execute the following command to start batch firmware update, and enter the file name and path you defined.
OneCli.exe update multiflash --configfile ./script/task.json --dir ./code
2,When prompted for Passphrase, enter the password that you set when you previously generated crypt.json.
3,It will be prompted that the target system will reboot. In this case, we will only update XCC, so the target system here means that XCC will reboot. Enter “Yes” to continue.
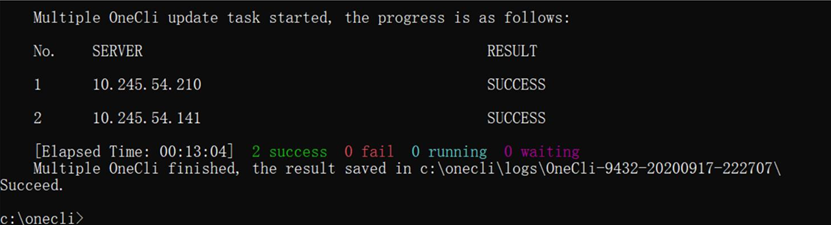
4,OneCli multiflash start, just wait it finish. Note: for XCC upgrade, it will show success after xcc firmware upgrade finish and xcc finish reboot and all servers start up. For uEFI upgrade, it will show success after uEFI firmware upgrade, but need you reboot the server manually to make the new version take effect.

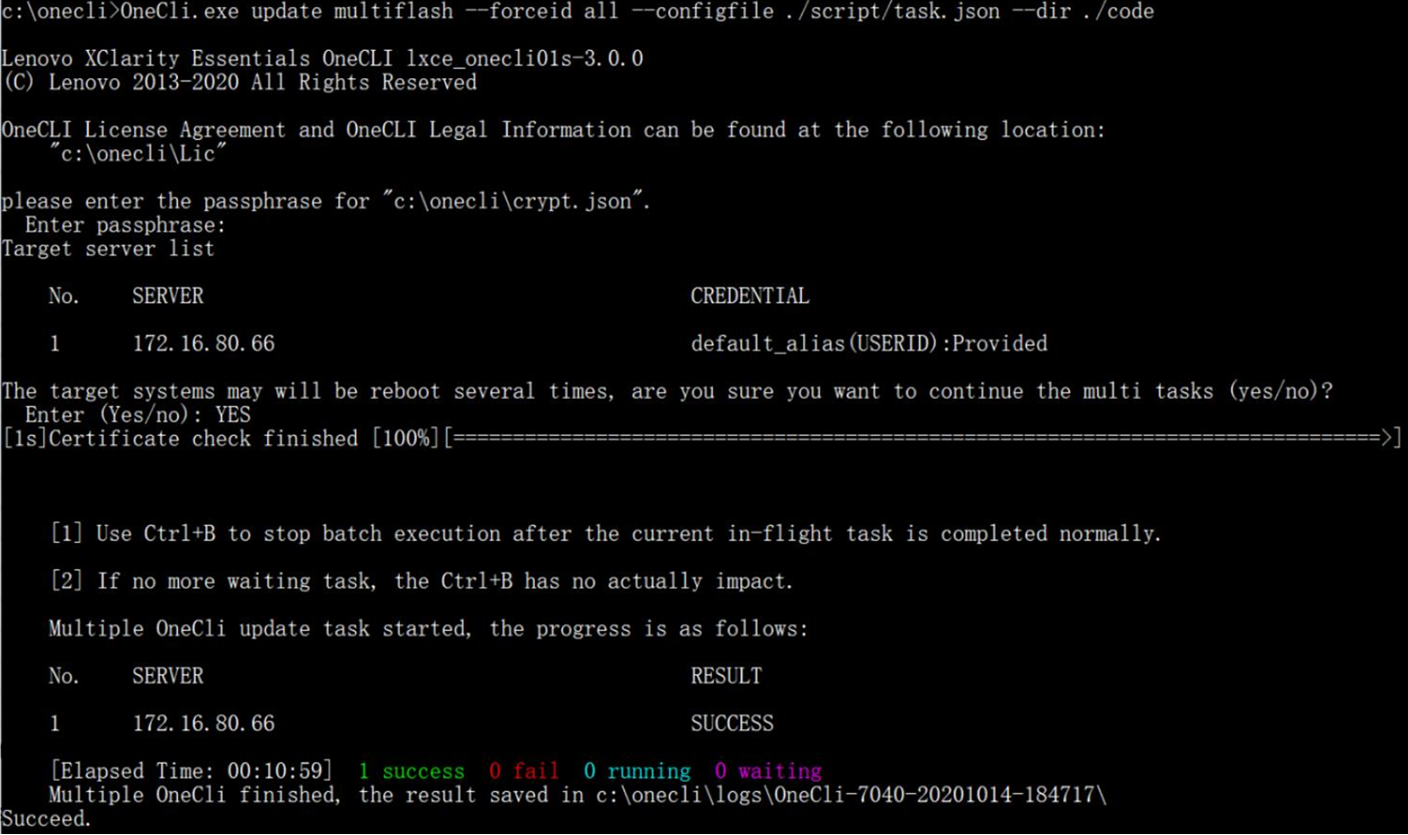
5, After multiflash task complete, it will show how many successes and how many failed. And it will indicate where to find the detail log files.
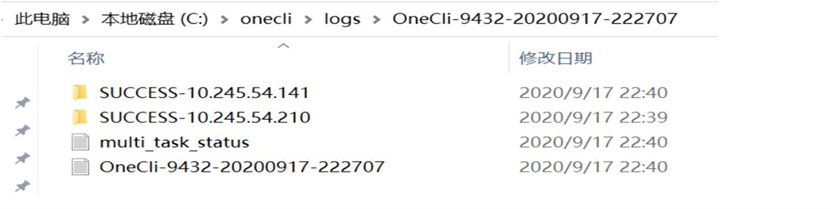
6, The “multi_task_status” is a summary for upgrade stats, and the folder name start with “SUCCESS” or“FAIL” contain the detail logs for each server.
三、 For Linux Platform
1,If you need to run OneCli on the Linux platform for batch firmware updates, all the steps are the same as on the Windows platform. Please follow the same steps to prepare the upgrade. Here are just a few footnotes.
2,Download Lenovo XClarity Essentials OneCLI from Lenovo support website. For example, download the version of RHEL, it can also be used under CentOS.
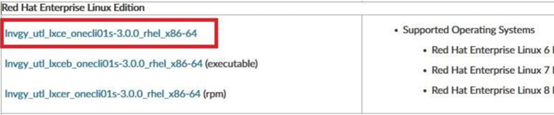
Download link:
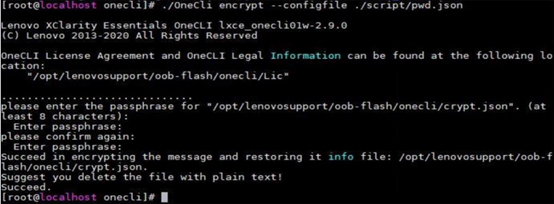
3, The upgrade commands used in Linux systems are the same as in Windows systems, such as password file encryption:
./OneCli encrypt --configfile ./script/pwd.json
4,Execute the following command to start batch firmware update:
./OneCli update multiflash –configfile ./script/task.json –dir ./code
四、 For batch downgrade
1, Like flash command, multiflash also support batch downgrade for system firmware.
2, Use “–forceid” option for this action, It supports to add the force tag for the update ID to enforce the downgrade. It also supports
3, Example of the command:
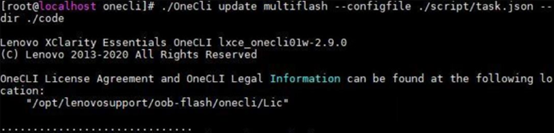
OneCli.exe update multiflash --forceid all --configfile ./script/task.json --dir ./code
五、 Perform in-band Upgrade.
1,Note: This is not a required action. In-band firmware upgrade is only a backup plan. It is not multiflash and you need upgrade the server firmware one by one. If any upgrade failed during multiflash, you could try in-band upgrade.
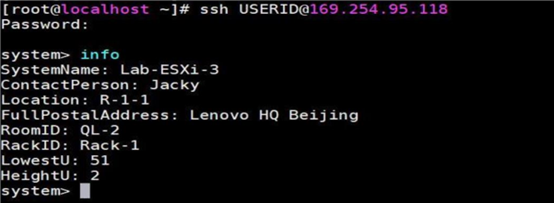
2, Before performing in-band upgrade, the first thing to do is to confirm that the in-band network interface of XCC is enabled and is accessible. There will be a USB0 network interface in the OS, and the IP address is 169.254.95.120, and the IP for XCC is 169.254.95.118. You can Ping this IP address or SSH login to make sure it is accessible.
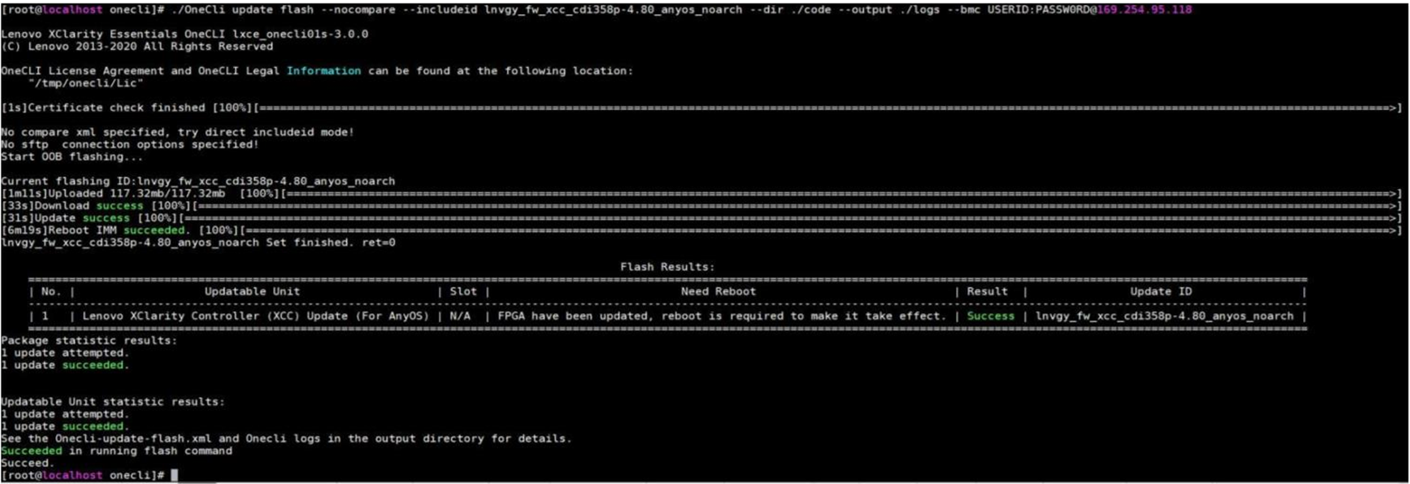
3,Perform the in-band XCC firmware upgrade operation with the following command. The firmware directory and LOG directory can be customized。
./OneCli update flash --nocompare --includeid lnvgy_fw_xcc_cdi358p-4.80_anyos_noarch --dir ./code --output ./logs --bmc USERID:PASSW0RD@169.254.95.118
六、 Attention for FPGA Upgrade
1, The FPGA firmware is not a standalone firmware, it is embedded in the XCC firmware. But not every XCC firmware release will include FPGA upgrade. Before upgrade XCC firmware, you need to check if the XCC version you plan to upgrade include FPGA upgrade. And the XCC version you skipped also need to check.
2, If the XCC firmware include FPGA upgrade, it was required to DC power cycle the server after XCC upgrade to make new FPGA firmware active. If the XCC upgrade do not include FPGA upgrade, no requirement to reboot the server. You can restart the server with OS or XCC, or with a tool such as IPMITool.
3, Note: This is a permanent requirement, if no DC power cycle the server after FPGA upgrade,it will cause the server unstable and any unknown issue may occur. So before batch update XCC firmware, please plan the maintenance window according to the actual situation.
4, You can check the XCC firmware change history file to confirm whether your XCC upgrade include FPGA upgrade or not. Below link is the SR650 XCC firmware change history file as an example.
https://download.lenovo.com/servers/mig/2023/10/19/58570/lnvgy_fw_xcc_cdi3b2o-9.87_anyos_noarch.chg
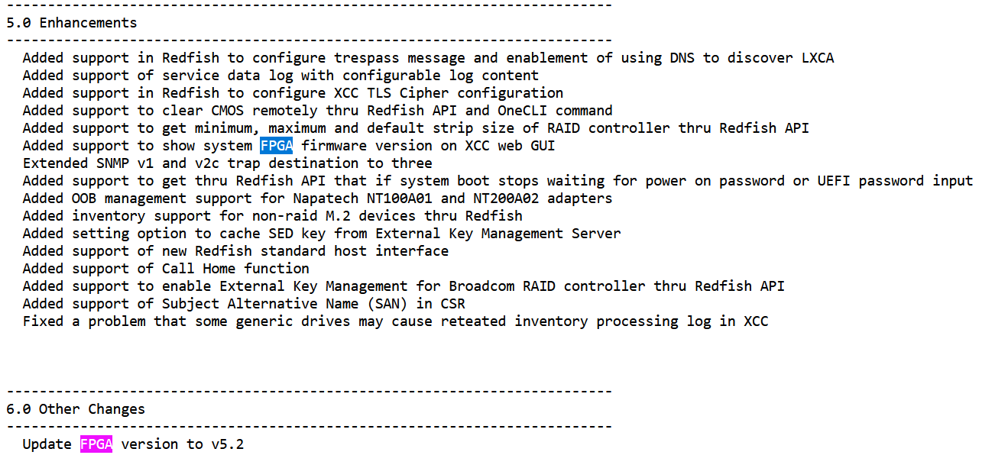
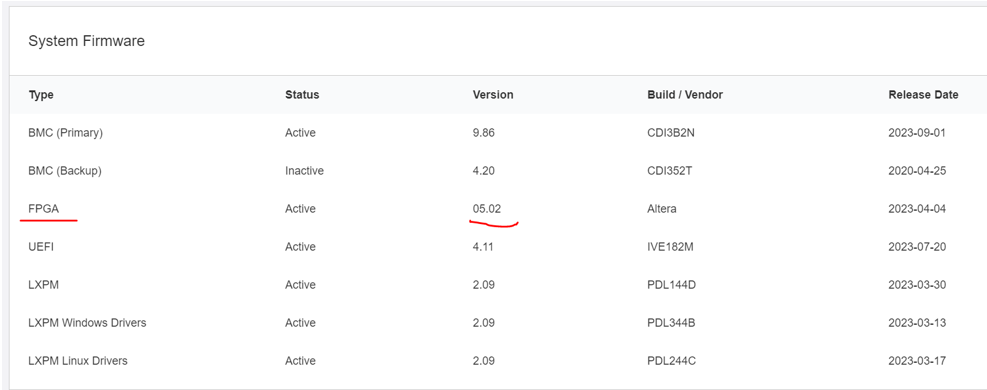
5, Most current newer versions XCC firmware support viewing FPGA version on XCC web page. But different server models may have different versions to support this. Please refer to XCC CHG file to check which XCC version support it for your server model.
七、 Other Attention
1, For uEFI upgrade/downgrade, the server will auto reboot to check the new firmware and take it effect. This is normal behavior based on current OneCli multiflash tool design.
2, The OS may not response correctly for gracefully power cycle, this may cause unexpected data lose or OS crash. Before performing multiflash for uEFI firmware, please make sure the data or OS on the server was fully backed up.
3, The XCC user account authority level must be Supervisor.
4, Please use XCC local user account, do not use AD/LDAP user account.
5, Only put the required firmware file into the “code” folder. For example, if only upgrade XCC, just put the xcc firmware file and XML file into the folder. Do not store any other firmware file in the folder to avoid unexpected firmware update.