Icinga 2是一个免费的开源监控工具,可以帮助你监控网络资源,获取停机警报,还可以生成性能数据。
Icinga 2具有很强的可伸缩性,可以跨多个位置监视小到大的复杂环境。Icinga 2支持所有主要的发行版,
如Debian、Ubuntu、CentOS / RHEL、Fedora、openSUSE、SLES、Gentoo、FreeBSD和ArchLinux。
本篇将介绍如何在CentOS7上的安装和配Icinga2。系统采用CentOS7.5
ICINGA项目是由Michael Luebben、HendrikB?cker和JoergLinge等人发起的,他们都是现有的Nagios
项目社区委员会的成员,他们承诺,新的开源项 目将完全兼容以前的Nagios应用程序及扩展功能。在新项
目的网站上,他们是如此定义ICINGA的,这将是一个介于Nagios社区版和企业版间的产 品。特别将致力于
解决Nagios项目现在的问题,比如不能及时处理Nagios项目的bug、新功能不能及时添加等。还有在新的
ICINGA项目中,将 更好的实现数据库集成方面的功能,标准化第三发应用程序的接口等
环境准备
1,配置主机名,IP地址
icinga.kclouder.local 172.16.60.70
2,关闭防火墙和Selinux
systemctl stop firewalld
systemctl disable firewalld
sed -i ‘s/SELINUX=enforcing/SELINUX=disabled/‘ /etc/selinux/config
3,安装必要的Repository
rpm -ivh https://dl.fedoraproject.org/pub/epel/epel-release-latest-7.noarch.rpm
rpm –import https://packages.icinga.com/icinga.key
yum install https://packages.icinga.com/epel/icinga-rpm-release-7-latest.noarch.rpm
安装Icinga2
1,安装Icinga2
yum -y install icinga2
2,启动服务并配置开机自动启动
systemctl start icinga2
systemctl enable icinga2
3,如果启用了SELinux,需要安装targeted policy,如果禁用了SELinux,跳过此步
yum install -y icinga2-selinux
4,如果启用了防火墙,放行5665端口。
firewall-cmd –permanent –add-port=5665/tcp
firewall-cmd –reload
5,安装Nagios插件
yum -y install nagios-plugins-all
6,安装数据库,Icinga2的IDO模块需要将所有配置和状态信息导出到数据库,所以我们需要安装数据库,
目前支持的数据库有MySQL和PostgreSQL。
yum -y install mariadb-server mariadb
systemctl start mariadb
systemctl enable mariadb
mysql_secure_installation
7,安装IDO模块
yum -y install icinga2-ido-mysql
8,创建数据库,为IDO模块创建一个数据库,在设置Icinga2 web接口时需要使用。方便演示,我们将数据
库名称,用户名及密码都设置为”icinga2”
mysql -u root -p
CREATE DATABASE icinga2;
grant all privileges on icinga2.* to icinga2@localhost identified by ‘icinga2’;
FLUSH PRIVILEGES;
quit
9,将IDO配置导放到数据库
mysql -u root -p icinga2 < /usr/share/icinga2-ido-mysql/schema/mysql.sql
10,启用IDO MySQL模块
icinga2 feature enable ido-mysql
icinga2 feature list

确认Enabled features中包含ido-mysql
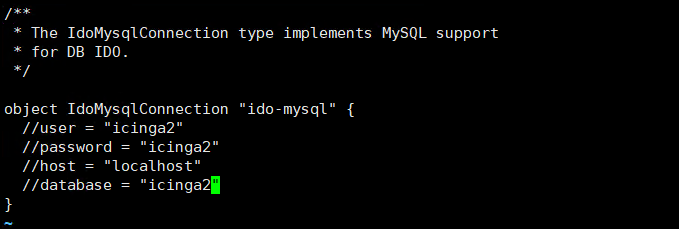
11,配置IDO DB MySQL模块
编辑如下文件如下图
vi /etc/icinga2/features-enabled/ido-mysql.conf
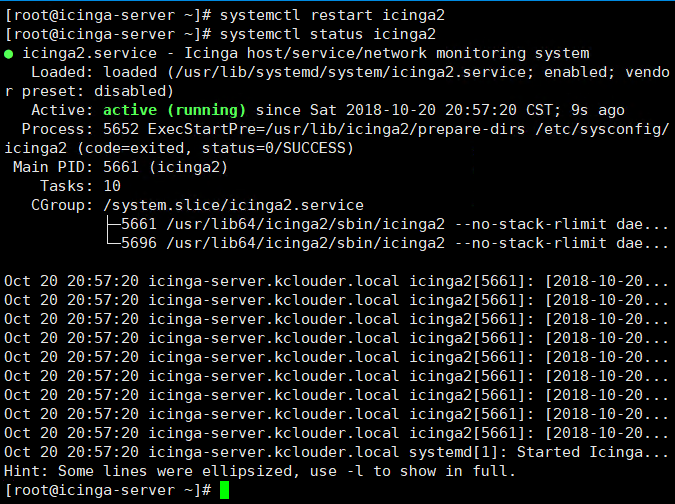
12,重启icinga2服务并确认服务启动
systemctl restart icinga2
systemctl status icinga2
配置Icinga2 Web
1,安装PHP和PHP插件
由于Icinga web 2所需的PHP版本比CentOS基本库中提供的高。所以我们需要先安装SCL存储库
yum install -y centos-release-scl
2,安装PHP包和插件
yum -y install rh-php71-php-json rh-php71-php-pgsql rh-php71-php-xml rh-php71-php-intl rh-php71-php-common rh-php71-php-pdo rh-php71-php-mysqlnd rh-php71-php-cli rh-php71-php-mbstring rh-php71-php-fpm rh-php71-php-gd rh-php71-php-zip rh-php71-php-ldap rh-php71-php-imagick
3,修改时区如下图
vi /etc/opt/rh/rh-php71/php.ini
date.timezone = Asia/Shanghai,并取消注释

4,重启服务并设置自启
systemctl restart rh-php71-php-fpm
systemctl enable rh-php71-php-fpm
5,安装icingaweb2 icingacli httpd
yum -y install icingaweb2 icingacli httpd
systemctl start httpd
systemctl enable httpd
6,如果启用了SELinux,需要安装targeted policy,如果禁用了SELinux,跳过此步
yum -y install icingaweb2-selinux
7,如果启用了防火墙,添加如下规则
firewall-cmd –permanent –add-service=http
firewall-cmd –reload
8,配置用户权限
Icinga CLI用于在命令行中执行管理任务。Icinga Web 2和CLI都必须具有访问日志和配置的权限。
添加web服务器用户(apache到系统组(icingaweb2)
groupadd -r icingaweb2
usermod -a -G icingaweb2 apache
9,创建Icinga Web 2配置目录
icingacli setup config directory –group icingaweb2
10,重启Apache和PHP-FPM服务
systemctl restart httpd
systemctl restart rh-php71-php-fpm
启动Icinga web2安装向导
1,生成令牌
使用以下命令生成令牌
icingacli setup token create

2,通过浏览器启动安装向导
http://172.16.60.70/icingaweb2/setup
将令牌粘贴进来,点击”下一步”继续

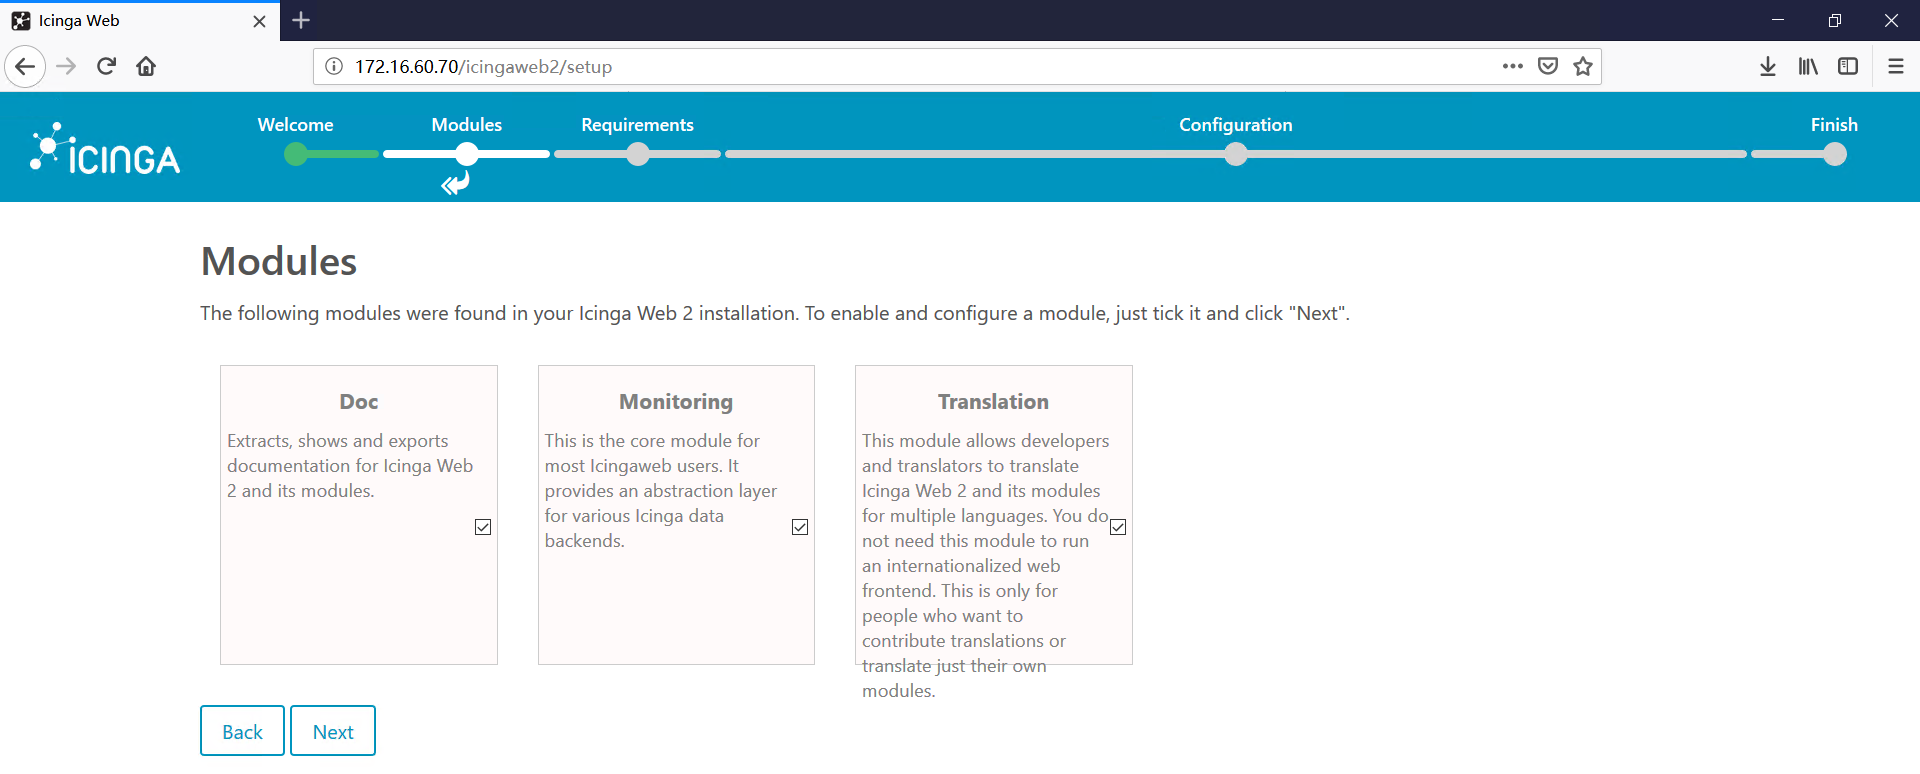
3,选择启用安装的模块,点击”下一步”继续。
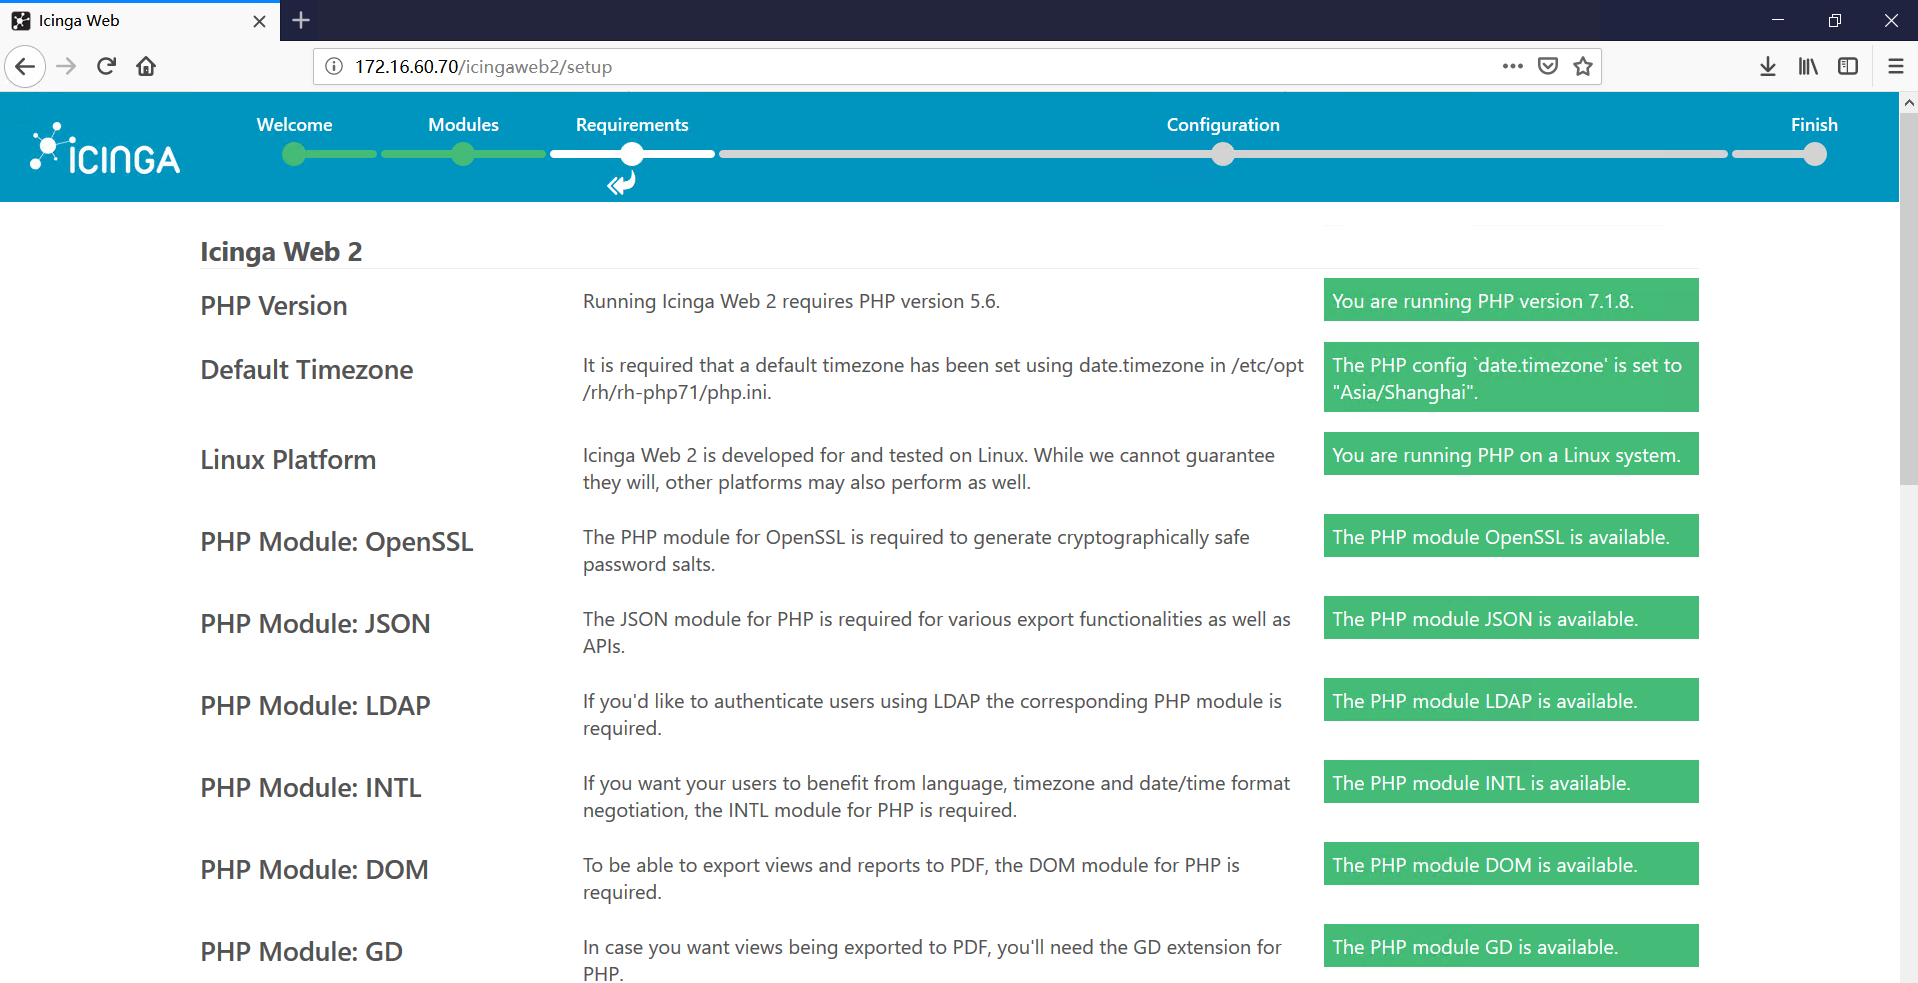
4,PHP模块状态检查,如果都是绿色说明所有模块都已经正确安装和配置,如果有红色的说明该模块没有
安装或配置错误。确保所有模块都是绿色状态后点击”下一步”继续。
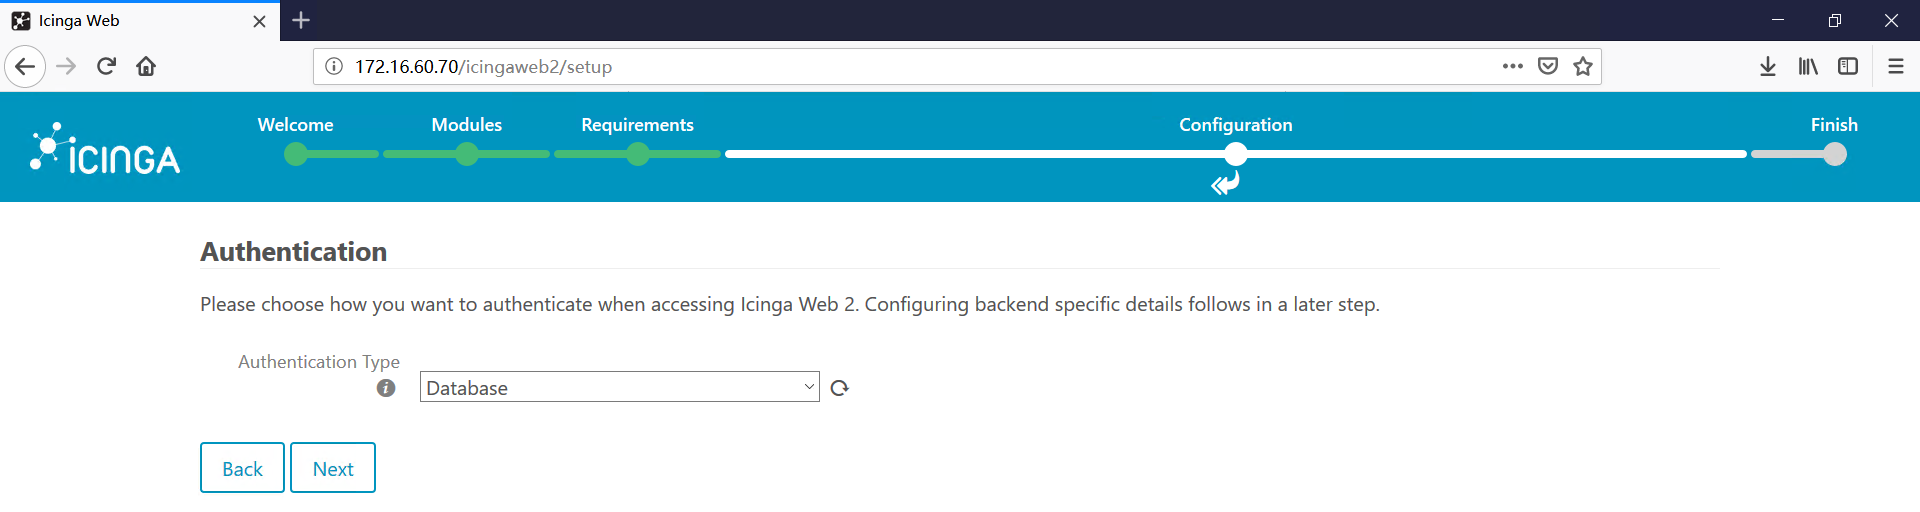
5,选择身份验证方式为”Database”,点击”下一步”继续。
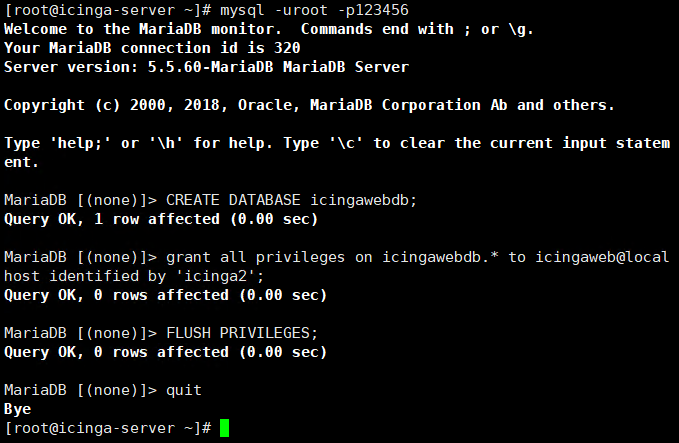
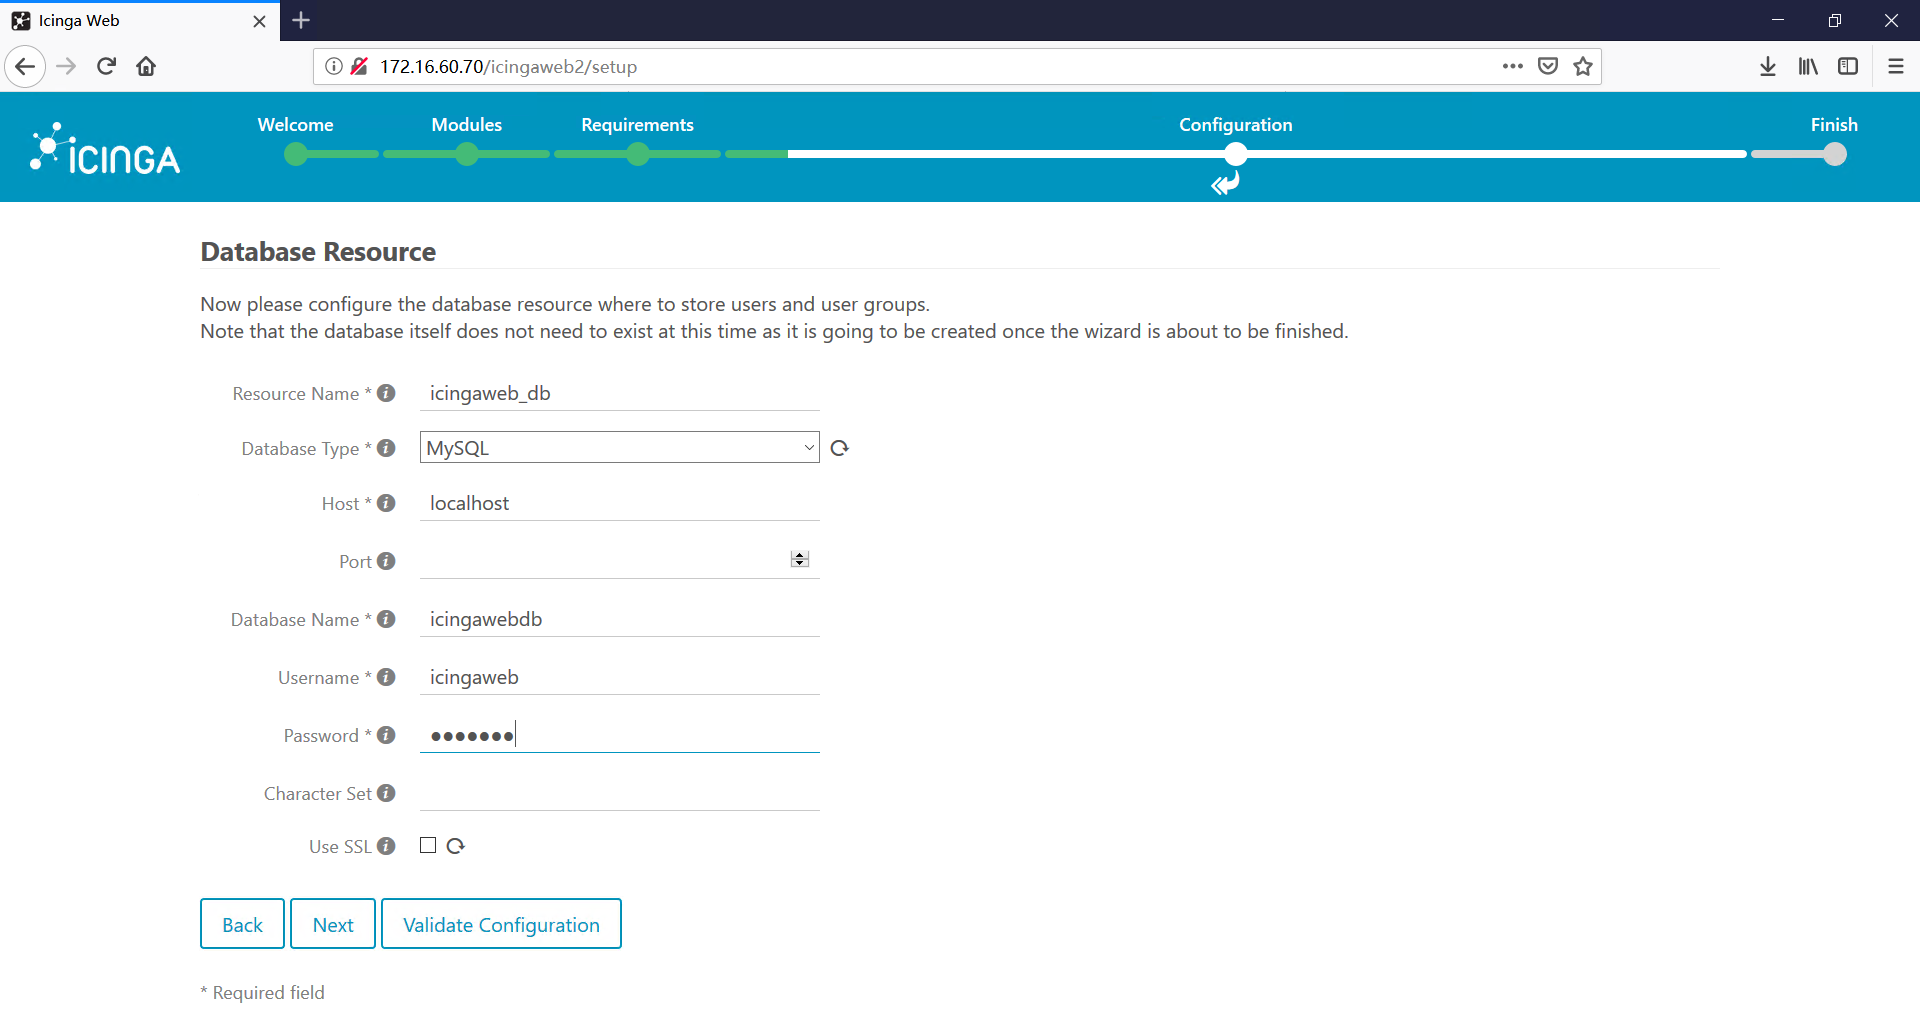
6,创建身份验证数据库
数据库名称:icingawebdb
用户名:icingaweb
密码: icinga2
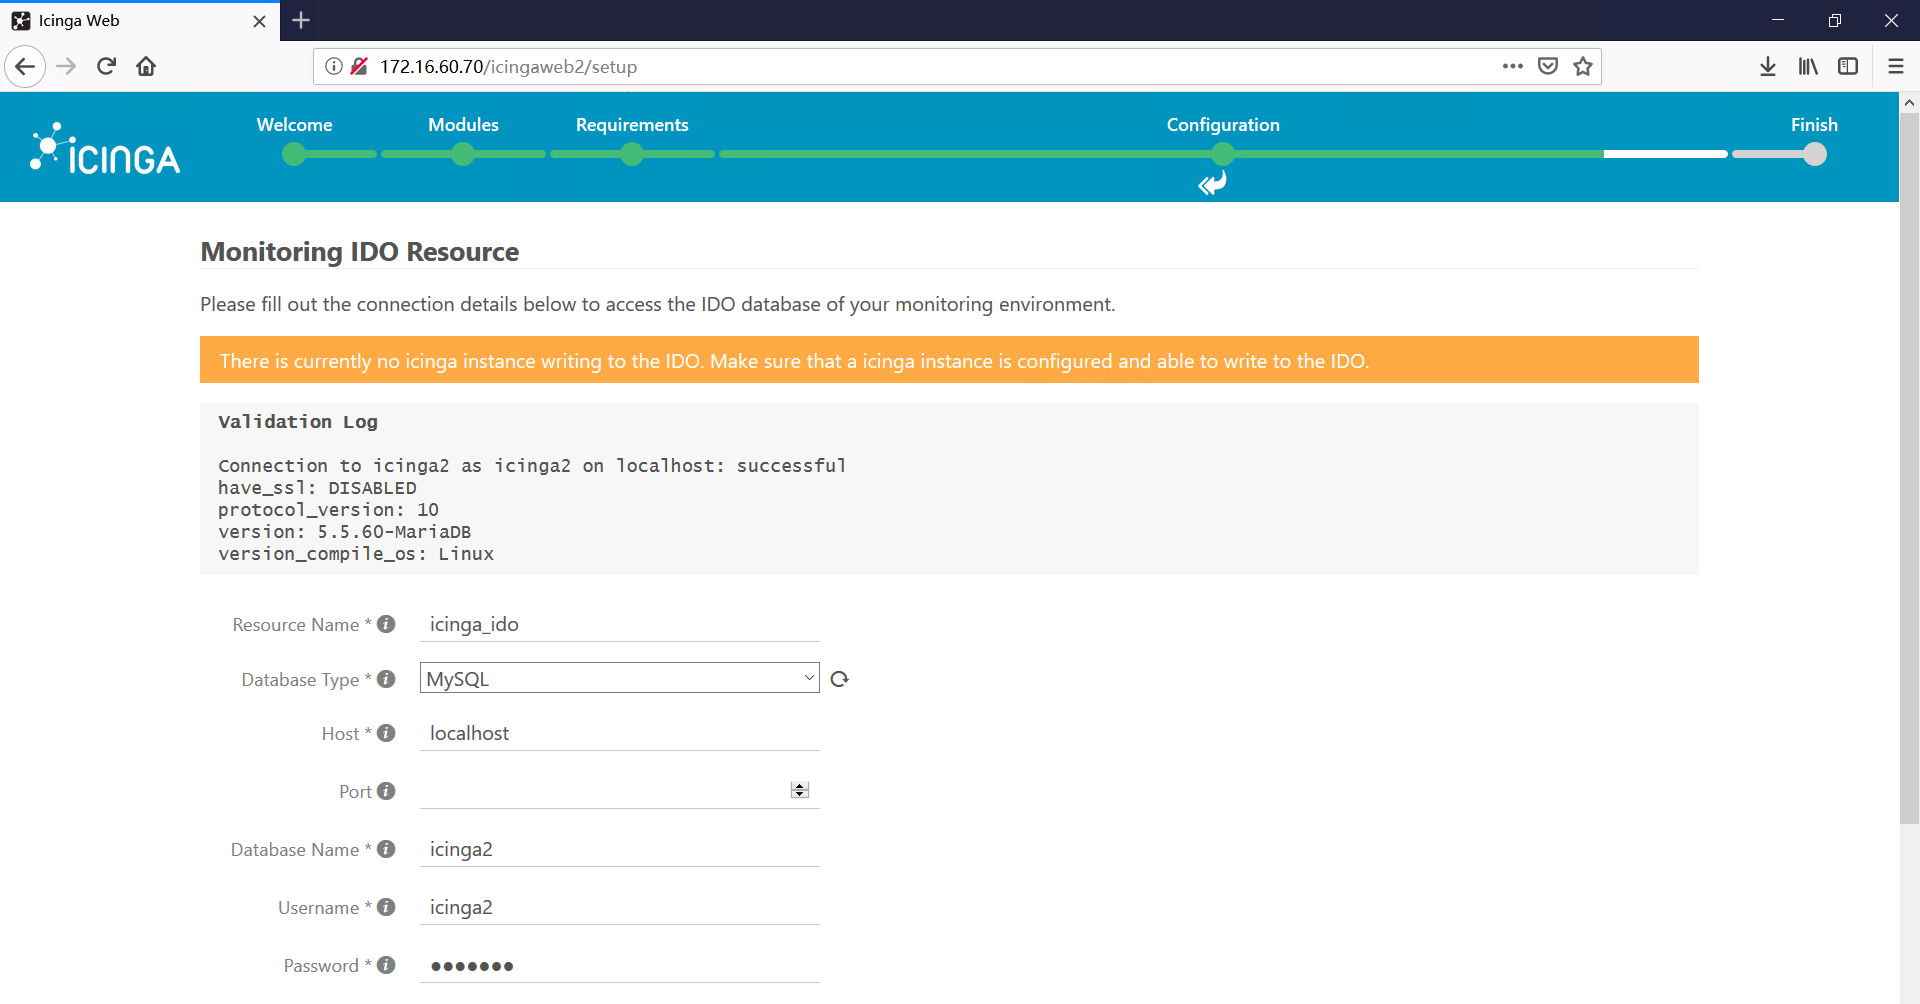
7,输入刚刚建立的数据库的相关信息如下图,点击下方的验证按钮,确认数据库可正确连接后,点击
“下一步”继续。
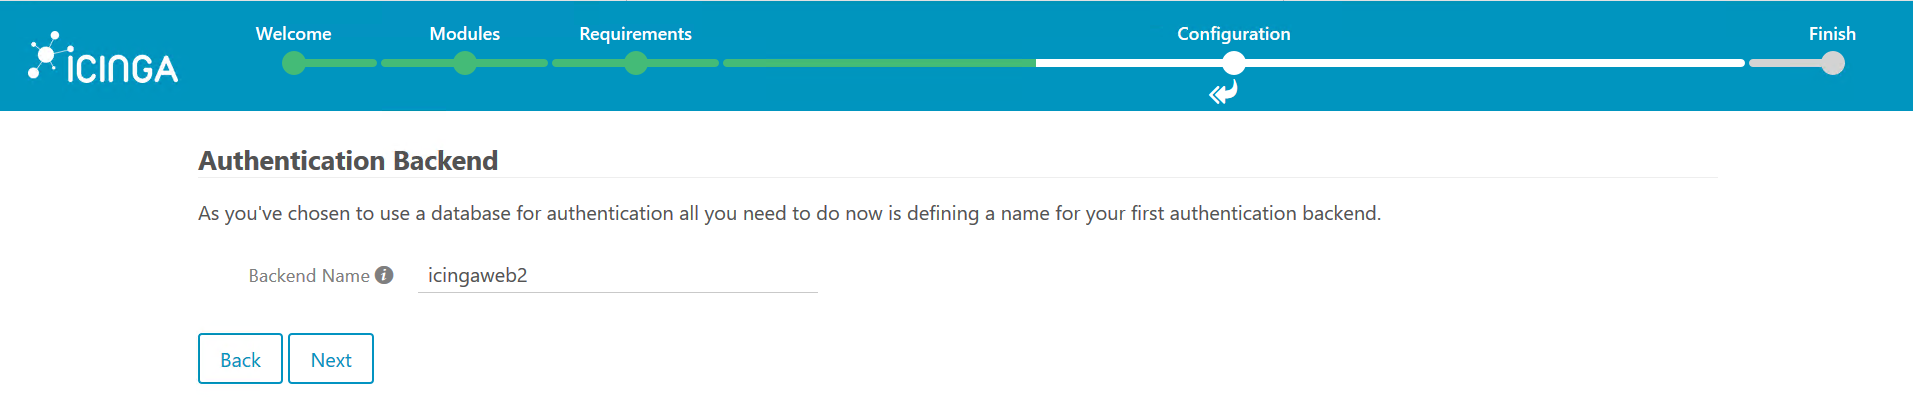
8,设置身份验证后端名称,点击”下一步”继续。
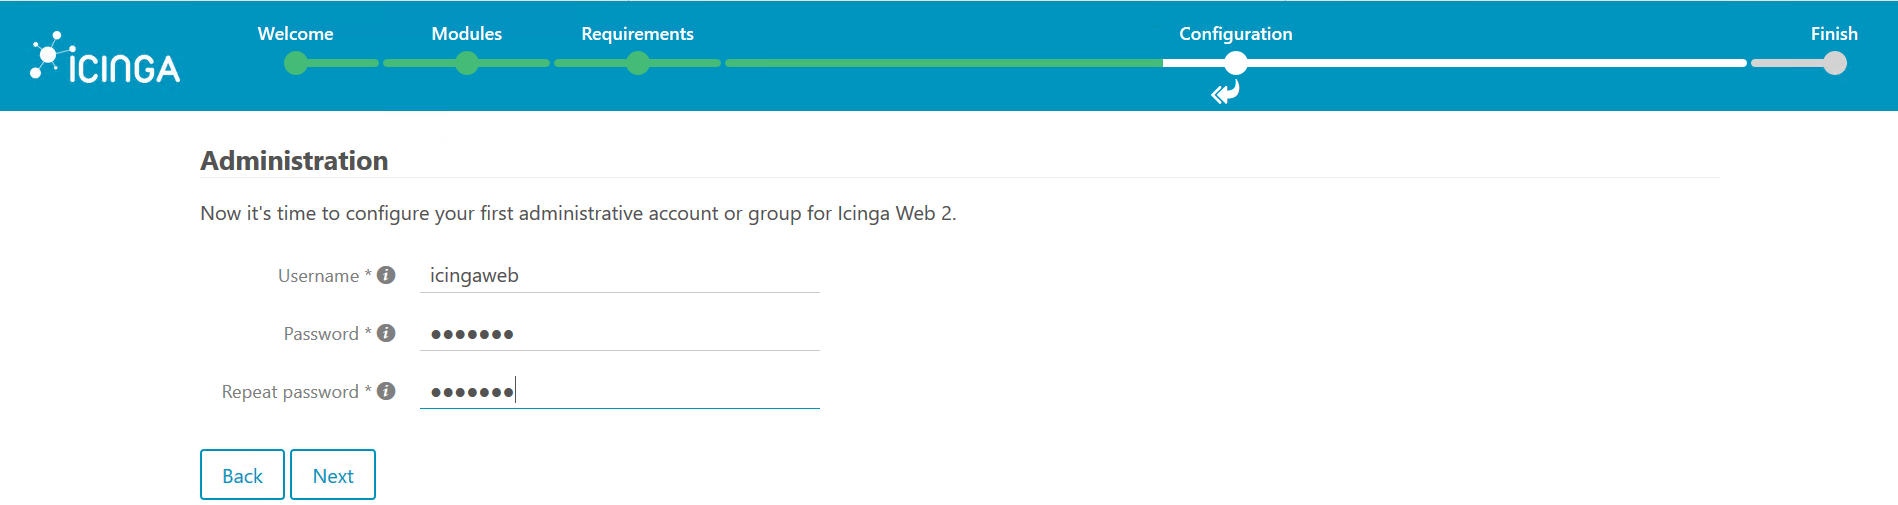
9,创建web管理员用户,这个用户是登录web页面的用户,与数据库用户无关。
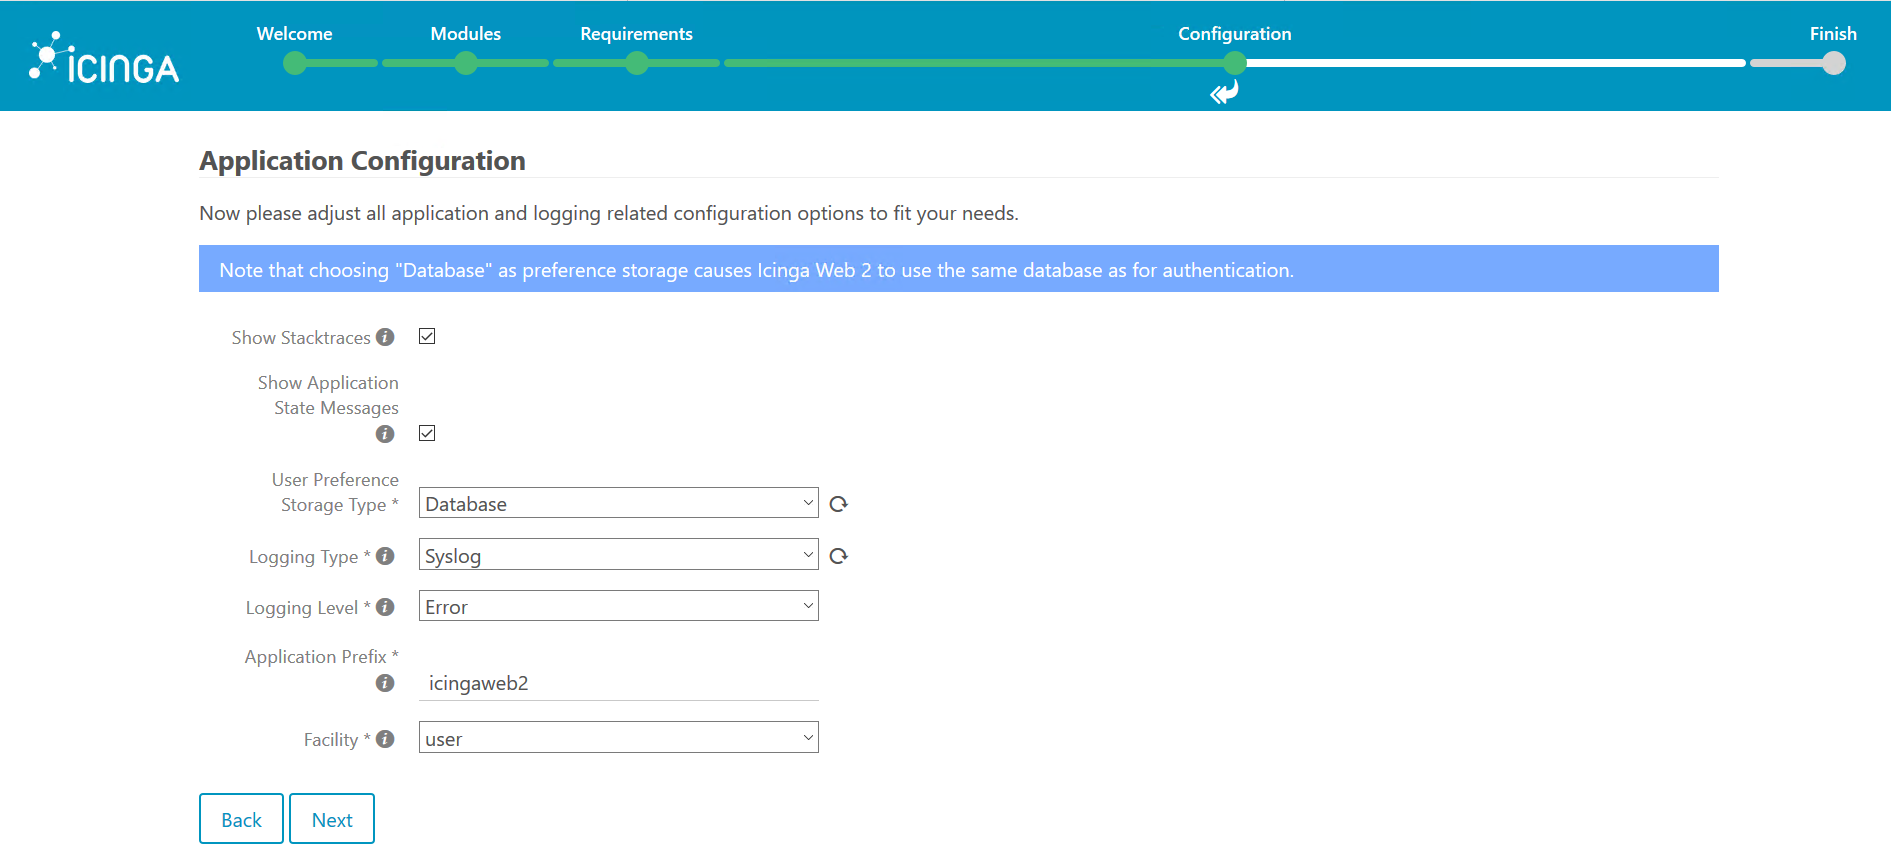
10,选择保存应用程序和与日志相关配置的位置,默认即可,不需要修改。
11,配置总结,确认无误后点击”下一步”

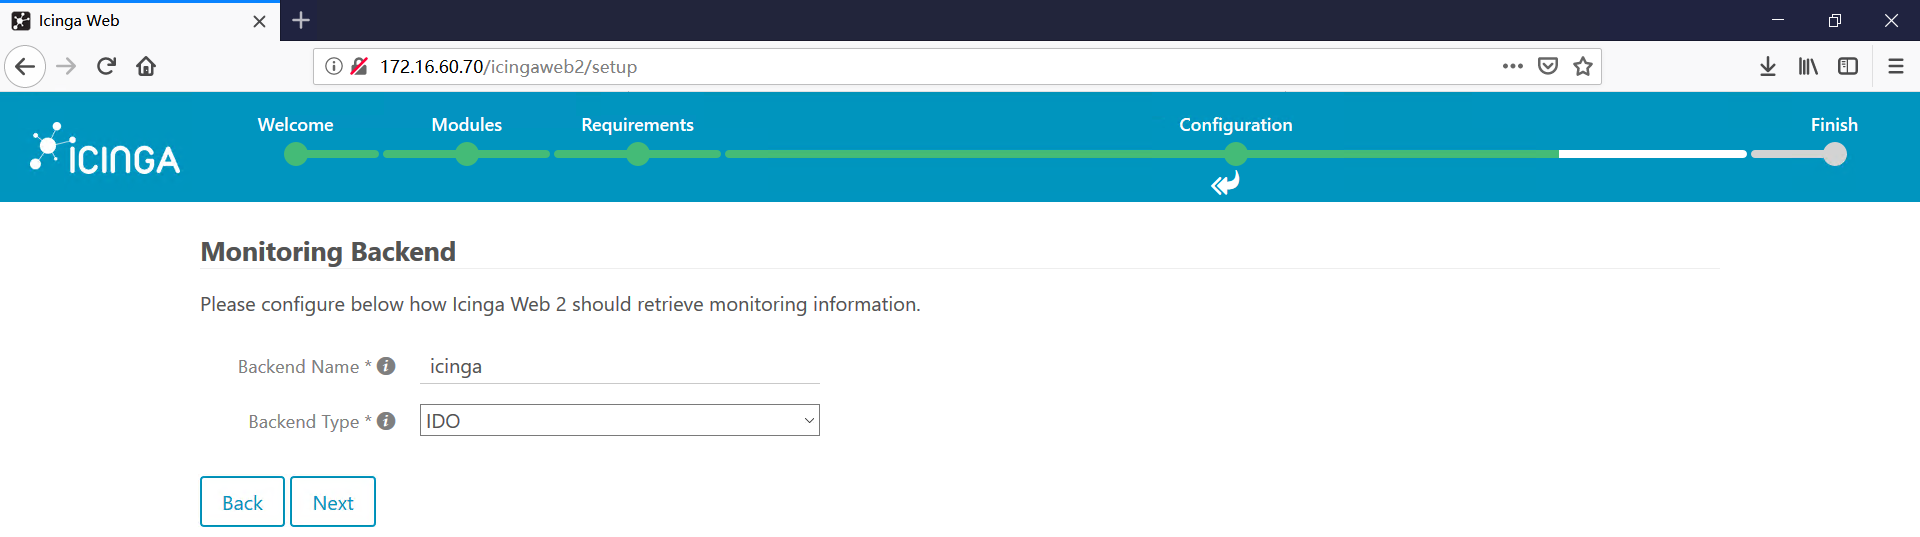
12,配置监视后端,该后端通知Icinga Web 2需要检索的监视信息。这里我们使用IDO。输入最初创建的
数据库的相关信息。
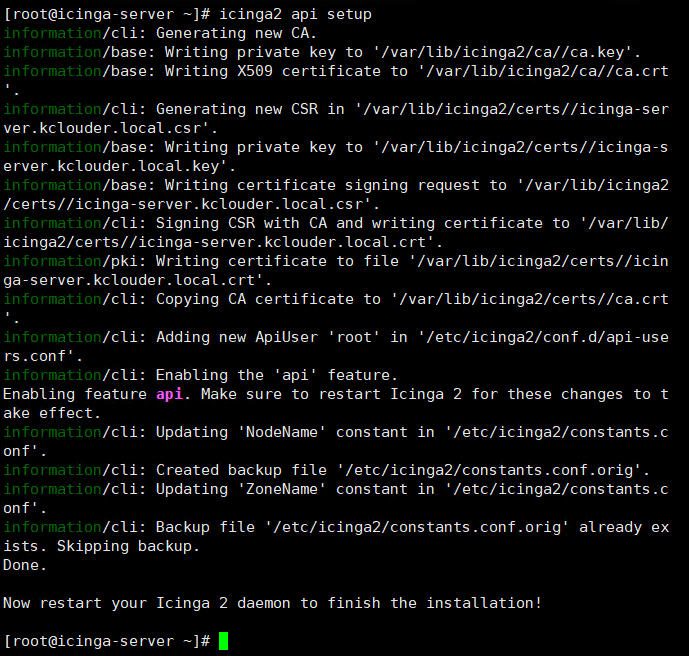
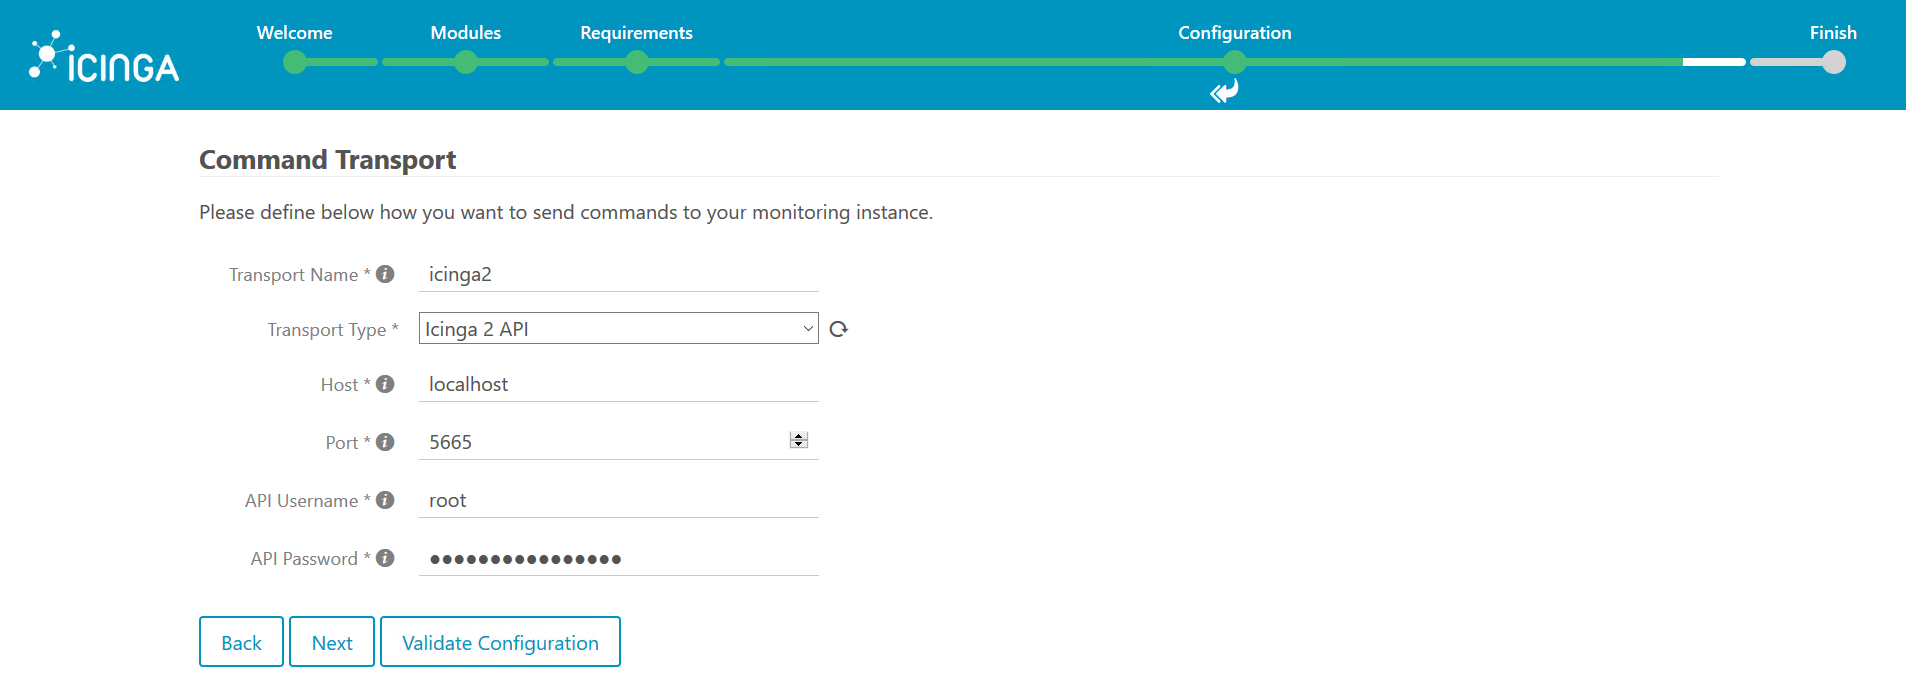
13,配置命令接口,这里我们使用Icinga 2 API方式
首先安装Icinga 2 API
icinga2 api setup
查看API接口的账号信息
cat /etc/icinga2/conf.d/api-users.conf
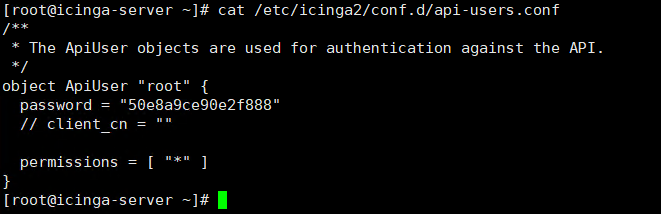
重启icinga2
systemctl restart icinga2
14,输入API接口的相关信息
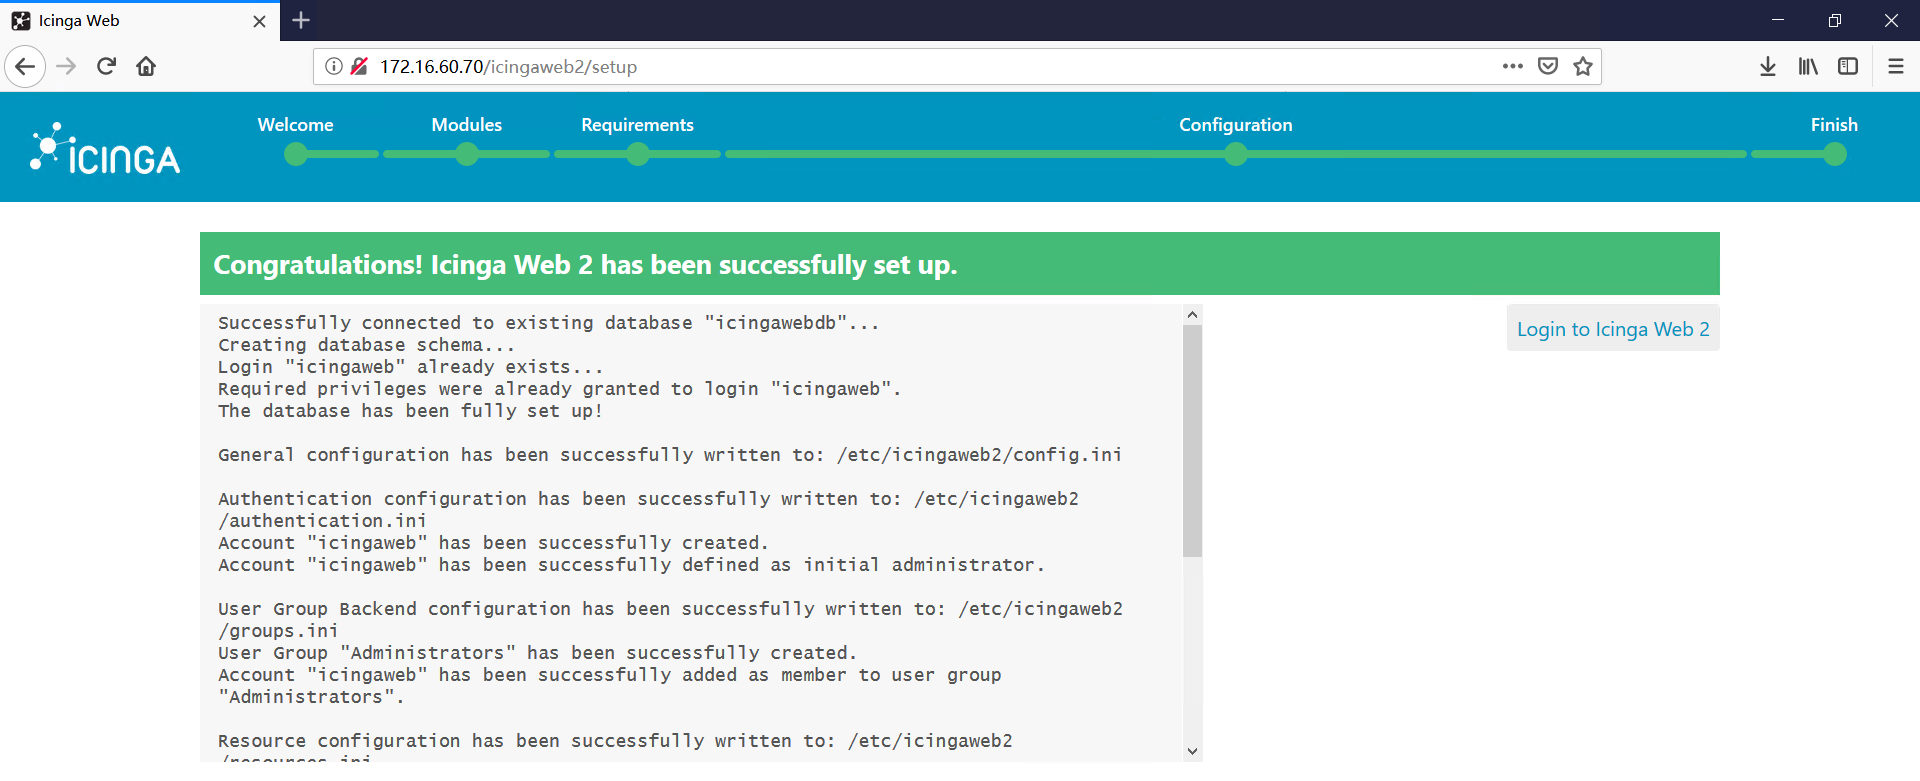
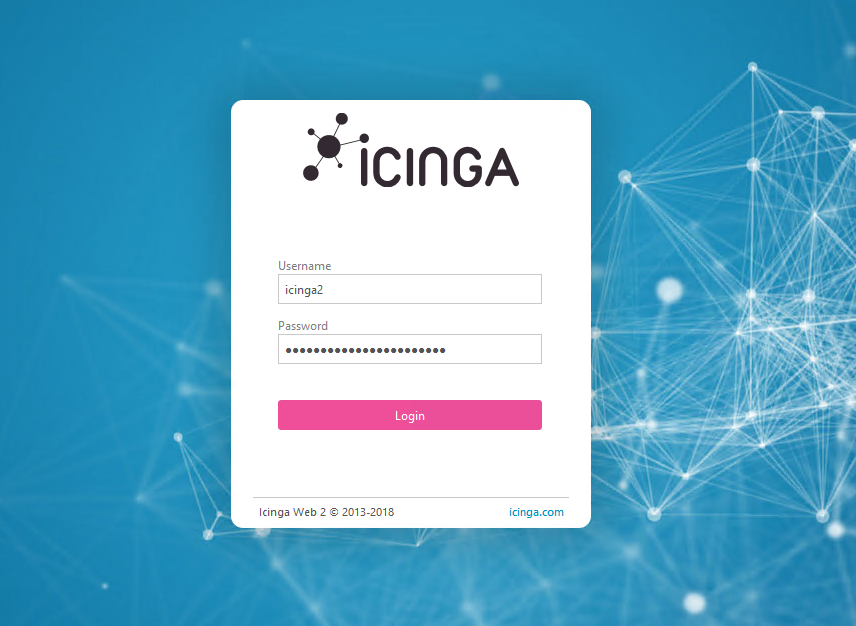
15,配置完成后,点击右上角的”Login to Icinga Web 2”转到登录页面,并确认可以通过前面创建的
用户正常登录